


Fonts are actually code, backed by specific font files stored on your computer or in an online repository. If we don’t have access to the fonts you’ve used, your file will encounter errors when we open it, and prevent us from preparing your file for the press. Converting your text to outlines changes your text to artwork (shapes) and removes all font information from the file. This means the text is no longer editable, but it also means we avoid font errors and can print your text exactly as intended.
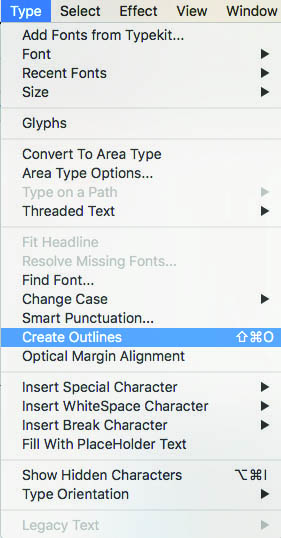
1. Choose the Type tool
2. Click inside the text frame you want to outline
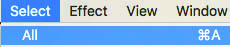
3. Do a Select All
4. Go to the Type menu and choose Create Outlines
1. First, delete any elements of the design that you don’t want to print. For example, you might delete the template layer, or any elements of the design that are on a layer you’ve turned off or made invisible.
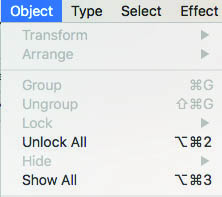
2. Ensure all remaining layers are visible and unlocked. To do this, go to the Object menu and choose Unlock All and Show All.
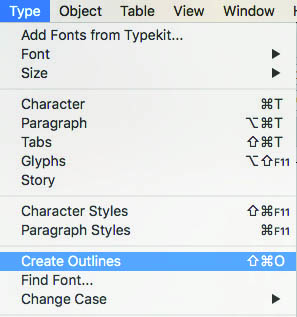
3. Do a Select All
4. Go to the Type menu and select Create Outlines.
1. Right-click on the Type layer and select Rasterize Type
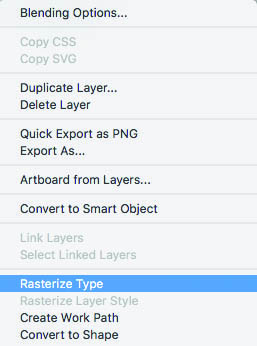
2. NOTE: If there are any “Smart Objects” used in your file that contain text, you will need to rasterize those as well.
